Saturday, November 28, 2009

Foot Scrub

Homemade Foot scrub

The skin of your feet also needs to be exfoliated and renewed like the skin in any other part of your body. There are different types of foot scrubs that are available in the market today. However, since most of them are quite expensive, people tend to skip them altogether. Do you know that you can make foot scrubs at home also? They are almost as good as the market ones and also cost much less. In order to help you out, we have listed a number of homemade foot scrub recipes in the following lines. After making these foot scrubs, all you have to do is wet your feet, ankles and calf and rub them with it, using circular movements. Thereafter, rinse off with warm water, dry with a towel and apply a moisturizer.

Homemade Foot Pedicure Scrub Recipe
Lime Foot Scrub
Ingredients

  • 3 Limes
  • 2 tbsp White Sugar
  • 1 tbsp Sweet Almond Oil
  • 15 Fresh Mint Leaves (chopped)
  • 5 drops Lime Essential Oil

Instructions

  • Cut the limes into small pieces.
  • Put all the lime pieces into a blender and form a pulp.
  • Mix the lime pulp with almond oil, mint leaves and essential oil.
  • Your lime foot scrub is ready to be used.

Sugar Foot Scrub
Ingredients

  • ¼ cup Sugar (white or brown)
  • ¼ cup Sweet Almond Oil
  • 6 drops Orange Essential Oil
  • 1 drop Ginger Essential Oil
  • 1 tsp Powdered Cayenne Pepper

Instructions

  • Take a plastic bowl and in it, mix together sugar and almond oil.
  • Add orange oil and ginger oil and mix well.
  • Stir in cayenne pepper as the final ingredient.
  • Your sugar foot scrub is ready to be used.

Peppermint Foot Scrub
Ingredients

  • 1½ cups Sea Salt
  • ¼ cup Sweet Almond Oil
  • 2 drops Peppermint Essential Oil
  • 3 drops Lavender Essential Oil

Instructions

  • In a bowl, combine together sea salt and almond oil.
  • The mixture should hold well. If it doesn't and seems dry, add almond oil, by the tablespoon, till you get the desired consistency.
  • Add peppermint oil and lavender oil. Mix well.
  • Your peppermint foot scrub is ready to be used.

Brown Sugar Foot Scrub
Ingredients

  • 2 tbsp Brown Sugar
  • 2 tbsp Ground Oats
  • 2 tbsp Aloe Vera Gel
  • 1 tbsp Honey
  • 1 tsp Freshly Squeezed Lemon Juice
  • 1 tsp Almond Oil/ Olive Oil

Instructions

  • First of all, you need to grind the oatmeal, in a coffee grinder or food processor, to a sandy consistency.
  • In a large bowl, put ground oats and add all the other ingredients. Mix them well, until the mixture resembles a paste.
  • Your brown sugar foot scrub is ready to be used.

Wednesday, November 25, 2009

Home Remedies For Dark Circle Under Eyes

Make a paste by mixing Fenugreek and milk and apply on dark area around eyes in the night. The next morning wash face. Dark circles around your eyes may gradually vanish.

Grate cold cucumber and apply that paste on dark circles. Repeat it for three mornings.

Applying grated potatoes on the dark area and leave it for 20 min. Repeat for few days.

Applying almond oil on the dark area will keep it soft and supple.

Or put cold cucumber slices on eyelid and dark circles ares gives wonderful results.

Putting slightly cooled tea bags on eyelids is good remedy for dark circles.

Tuesday, November 24, 2009

Night Cream


The Best Night Cream Contains Japanese Wakame


Western skincare has just taken a tip from Japan. The best night cream now contains Phytessence Wakame, a powerful antioxidant that is all-natural and derived from a Japanese sea algae plant. This compound has been proven to maintain the balance of moisture in the skin, which improves the skin’s elasticity and prevents wrinkles.

Wakame, which is a form of seaweed, is a popular food in Japan due to its high levels of iron and potassium. Wakame is also quite rich in B vitamins, which are essential to skin health. When using wakame-containing skincare products, you can also reap the benefits of this mineral-abundant plant.

Monday, November 23, 2009

Tips Coloring Your Hair With Henna!


Henna Hair Coloring Tips

One of the oldest beautifiers known is Henna. It will always give your hair a beautiful shine.

Henna is considered a very good natural conditioner since it strengthens the hair. A big advantage of coloring your hair with henna is that it is natural and therefore colors your hair in a safe manner.

Henna hair color can last up to four to six weeks and it works great on brunettes and dark blondes.


Hair is how to color your hair with henna. Henna must be applied to a clean, dry hair.

- Apply Vaseline or almond oil to your forehead, around the hair line and ears in order to prevent staining your skin.

- Put the henna powder in a bowl and add lemon juice or water. Mix the ingredients until you get a smooth paste.

- Divide your hair into several sections.

- Begin with the bottom layers of your hair and gradually work your way up. Be sure to apply the paste evenly.

- Wrap your hair in a towel and wait. How long you should wait depends on your natural hair color. If you have dark hair you should wait for two to three hours. If you have lighter hair you will need to wait four to eight hours.

- Rinse your hair until the water is completely clear. DonĂ¢€™t use hot water but lukewarm water; donĂ¢€™t shampoo as well.

Remember henna is permanent and you cannot dye over it.

Sunday, November 22, 2009

Tips To Choose Body Lotion


Choose Natural Body Lotion


Skin care body lotion should be chosen after careful research because it should not only be meant as a complete moisturizer, but should also minimize the effects of pre-mature aging. This article will give you some tips on choosing the right body lotion.

There are basically three types of skin: dry, oily and normal or a combination of both. For dry skin, vitamin C is excellent. Creamy moisturizers are required for the dryness to hydrate it completely. People who have normal skin often neglect the importance of a good skin care body lotion. As a result, their skin suffers from dry patches, blemishes and sometimes even acne.

Oily skin is prone to acne and therefore an oil-free moisturizer should be used along with a good quality body lotion for this type. The best products available out there for oily as well as dry skin are homemade masks and body lotions. Choose a lotion according to your needs and you will not have to worry about the side effects and other complications.

Substandard skin care products contain some harmful ingredients like preservatives in the form of parabens. In addition to these, they also contain fragrances and other additives. All these substances are not good for skin health and you should avoid them at all costs.

Body lotion is also added to a system of products containing moisturizers, toners and cleansers. These systems are good for all types since they are a complete solution for the treatment of many skin problems.

Use a moisturizer and toner regularly in addition to a good body lotion. They will help to hydrate your skin and keep it smooth and flawless. Regular skin care is vital to its long-term health and also helps in the prevention of disorders including acne, eczema, wrinkles, spots, redness, rash and aging signs.

An alarming fact is some of these products contain mineral oil for the treatment of pre-mature wrinkles. Don't fall into the trap of such advertised hype as mineral oil is not good for the skin at all. Always choose a skin care body lotion from a reputed manufacturer and do some research on all its ingredients before using it.

Choosing the best skin care body lotion for your skin type is the key to beautiful and healthy skin. It helps to prevent pre-mature wrinkles, acne and many other skin-related problems. So, don't neglect the importance of a good quality body lotion and use it for improving your skin health.

Dandruff Control

Some Tips On Dandruff Control 

Are you looking for how to control dandruff at home using simple home remedies? Just read this article and you will find the solution. A dirty itchy scalp is the major cause of dandruff so it is very important to maintain a good health care for your hair and scalp. Dandruff is a problem that needs to be treated very carefully whenever it occurs.
There are several home remedies that are very effective in controlling dandruff. These home remedies require ingredients that can be easily available in your kitchen. Anti-dandruff products available in the market can cause damage to your hair and your hair can start falling or even you can see premature graying of your hair. On the other hand, home remedies are simple, inexpensive and free from harmful effects.


Home remedies to control dandruff –
1. The first and the most important home remedy for dandruff is to keep your scalp and hair properly clean. Wash your hair at least twice a week.
2. Excessive shampoo can strip the natural oil from your hair so try using a natural based shampoo. Using herbal shampoo (especially neem shampoo) with anti-bacterial and anti-fungal properties prevents any infection and keeps your scalp protected from dirt and germs.
3. You can also use a mixture of coconut oil, or neem oil with a spoonful of camphor. This is very effective home remedy for dandruff.
4. A hair wash with vinegar is also a useful remedy for dandruff. Mix 2 teaspoons of vinegar with 6 teaspoons of water, and apply it on your scalp before going to bed. Apply the same solution in the morning before washing it off. Do not scratch your scalp with your fingernails as it could cause an infection.
5. Follow a balanced diet to provide your hair with the right amount of nutrients that include fruits and vegetables, proteins and fiber. Drink plenty of water (8-10 glasses daily) to flush toxic substances from your body.

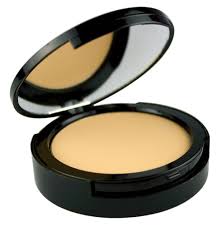
Foundation For Oily Skin

Searching The Best Foundation for Oily Skin

See full size image

Sometime people need the best foundation for oily skin to ensure they can cover up the acne blemishes without looking too obvious. Having oily skin can make this difficult, because makeup often give the face a certain, unattractive sheen.

Oily skin can be a big problem for many women because it's so hard to deal with. Most cosmetics are lots really geared specifically for skin with higher than normal levels of oil. And this can cause a lot of problems. If you wear a foundation that is not specifically designed for oil skin, the result can be a whole series of blemish breakouts.

Blackheads, whiteheads, and zits all form because there is too much sebum oil in the skin. The excess oil clogs up the pores and interferes with a normally healthy process that keeps the skin nice and lubricated.

This trapped oil mixes with dead skin cells and bacteria to form blackheads. Blackheads can easily lead to acne breakouts if the area around the blackhead gets infected. Thus it's very important to prevent this situation from occurring in the first place. The way to go about doing this is only wear cosmetics for oily skin. These cosmetics are not oil-based and won't trap oil underneath. They essentially allow the skin to breath.

The downside to foundation for oily skin? Water-based makeup products tend not to last as long as oil-based products do. Instead of wearing make the whole day, you only get about half that day. Now this can vary depending from manufacturer, but know that with water-based makeup, you will have less "wear" time than with oil based products.

You should always wear best foundation for oily skin if you have acne-prone skin. The are many oily skin solutions out there for you to chose from which will help you with your problem.

Friday, November 20, 2009

Tips to have seductive Lips

pink lips tips

No matter what make up is trendy this season, there is one thing that never goes out of fashion lips that look healthy, full, voluptuous and tempting. Even if your make up doesn’t emphasis on your lips, good looking lips always make you look healthier, happier and more attractive. On the other hand, if you prefer to underline your lips with a bright bold color, you should know how to wear lipstick the right way and avoid the clown look. Using these simple and easy tips, you can have full and sexy lips using products you probably already have.

Get rid of everything that uglifies your lips!

2 or 3 times a week clean your lips with the peeling product you use on your face. Use the exfoliator to brush gently their surface, which should be absolutely dry and make-up free. When you’re done, remove any scrub residues using cotton, soaked in face tonic. Dry gently.

Make them soft and tender

Whether you decide to use a special balm or a super hydrating cream, never forget that your lips don’t have any sebaceous glands to produce sebum. That’s why they are extremely delicate and easily get irritated by cold, dry air, rough wind and other aggressive environmental factors. Apply a thick layer of the lip care product you’ve chosen and wait for the product to penetrate your lips. Don’t rub, just wait for about 5 minutes and then use a soft wipe to soak any excess balm/cream. You can deal with chapped lips with great success if you apply a natural shea butter lip balm each night. The lip balm will take effect at night while you’re sleeping and in the morning you’ll have soft, moisturized lips and a perfect base for your makeup to put on. Don’t forget to use the product frequently, especially in winter. Also, when using a hydrating or nourishing face mask, don’t forget to apply it on your lips, too!

Now you have created the perfect base for your lips make up and can proceed to applying the perfect shade. How to make your lips look fuller, how to fix little lip imperfections and how to wear lipstick – below.

Little tricks for prettier lips

If your lips are too thin and you wish they looked bigger, there is something you can do about it. This is what you need to do in order to make your lips appear fuller:
Outline your lips with a light lip liner in a color that suits your skin tone. Draw right on the top of your lips’ natural line, don’t go outside of it (this way you’ll avoid the funny clown look). When you’re done with the lip lining, it’s time to apply lip color and/or high shine lip gloss. You can use high shine lip color instead of lip gloss. To enhance the 3D effect of the lip gloss/ lip color, you can try to line your bottom lip with a lip liner that is 2-3 shades darker than the lip color. In general, darker lip liner creates that pouty look, so be careful with it. You should apply the lip liner before applying the lip gloss/ lipstick.
If you’re unhappy with your lips’ shape, you can fix it up using face foundation. If you need to deepen your V formation, cover the middle portion of your lips with face foundation and create a beautiful V-shaped curve using your lip liner. Add some lip color and gloss and it’s done – sexy lips as easy as pie!

What about the lipstick?

The first question that comes in mind when talking about lipstick is glossy or matte. The answer of that question depends on the result you’re after. Matte ones are more durable and last longer on your kissers. They are also more discreet and thus are perfect as day wear. Glossy lipstick makes your lips look fuller, but you’ll have to apply it more often for it’s less durable than the matte lipstick. Although with its millions sparkling particles it looks sensationally for evening wear.

Thursday, November 19, 2009

Prevent Blackheads!

Blackheads Remedies at Home

To get rid of them, you should understand what they were. Correct definition of the black dot is black tipped pimple on the skin. This is the type of acne that anyone can experience. Question comes to mind is: How do the black spots appear? Partially closed pore favors the appearance of milk, bacteria and other types of materials found on the skin in pores.

These materials gradually penetrate the skin's surface. Dark color is not given by the presence of bacteria or dust particles, but by the composition of milk material, called keratin, and water has no effect on him. Black spots "may be an effect of chemical reactions between melanin oxygen from the air.

In general, the black dots are quite steep and may be very difficult to remove, which is why they bother us much. Therefore, it is wise to check periodically, because they tend to be more deeply into the skin, and remove a task becomes more difficult for us. Although he could dissolve their black on, they leave a mark on the skin. Therefore, sooner you get rid of black, the skin tone better than you the good news is you can do yourself. You can deal with black you.

Effective treatment to manage the house is a mixture of ground radish seeds and water, apply skin. Another simple way to get rid of black is to put your face against the hot steam 5-7 minutes and after that beating you with fine linen. Another non-conventional treatment is a mixture of soap and glycerine, Fuller's earth and almond powder in relation 2:1:4 proportions and carefully mixed with water at 1000C. The dough is placed on black spots, there are tons of work and then washed your face with water.

Treatment and time again is to remove black leather cream roasted pomegranate juice lime powder on them. Similar treatment is to bring together the peanut oil with lemon juice and spread on the skin. Wait 10-15 minutes then turn off your face with water. This treatment prevents daily for blacks.

Wednesday, November 18, 2009

Removing Acne Scars


Secrets To Remove Your Acne Scars


There are several ways on removing acne scars. The appearance of acne starts during puberty when the body actively produces hormones that causes too much sebum in the skin. This skin stage may pass but it would definitely leave marks to haunt your appearance forever. Treating acne scars can be done through natural inexpensive ways and dermatological procedures that would probably cost a lot. However, acne scar treatment still depends on the mildness and severity of the scar.

Below are some of the techniques on removing acne scars naturally:

1. Hydration is the key. It has been proven that water is one of the best natural methods to remove acne scars and prevent acne breakouts. Drinking at least 8 glasses of water or more helps your skin to shed those unwanted dead skin cells.

2. A lot of people are recommending the use Vitamin E capsule for those scars. You might apply it topically to the affected area by pricking a spot in the capsule and apply the oil to the scar. Another option is to take it orally to have that cell renewal from the inside.

3. Rosehip seed oil is also an effective remedy on removing acne scars. This is an anti-ageing and anti-wrinkling agent that helps the skin to regenerate. Massage it on the scar twice a day.

4. Eating a balance diet may help in removing acne scars. The more nutritious foods you include in your meal, the faster the scar will heal. It helps in building the skin cells and gives a healthy skin glow as well.

5. Combine rose water and paste of sandal wood and apply it on the spot where the scars are. Leave it overnight then rinse with cold water the next day.

Aside from the natural ways of removing acne scars, there are also dermatological procedures that would definitely give you a much faster result. However, pregnancy and other health conditions may hinder your want to undergo these procedures. Here are some of the hi-tech methods can remove acne scars effectively.

6. Nowadays, not only certified dermatologists do a dermabrasion but facial salons as well. Dermabrasion is the removal of the top skin layer using a machine that chafes off the skin. Once the skin heals, the top layer will then have a smoother and clearer appearance.

7. Laser resurfacing is one of the most affordable anti-scar treatments available. It simply uses a high-energy light that would remove the fine scars and even prevent wrinkles.

8. You may also have a chemical peel procedure. This is just like dermabrasion. The only difference is that the top layer of the skin is peeled off using chemicals not machines. This is not a very advisable procedure for all since some people may have allergic reactions to the chemicals.

With all the available choices for treatment, you surely would not have an excuse as to why your acne scar is still obvious. It's your choice whether you would opt for the natural way or the dermatological procedure on how to remove acne scars.

Lose Weight In A Month


Way To Lose Weight In A Month

When you want to lose weight in a month and you are selecting a low calorie diet plan, make sure you are consuming a balanced and complete diet.It is not recommended to avoid all types of fat,you can eat good fat,such as unsaturated fat,found mostly in vegetable oils,nuts,seeds.

How to lose weight in a month?Start by following these simple guidelines below:

1. Aim to consume four to six small meals and snacks everyday.Keep the diet simple when you start,it will be easier to increase your standards if you have the aim to lose weight in a month.Start by simply just counting calories and avoiding saturated fats.

2. Eat your foods slower.This will help your body to take a higher percent of nutrients,vitamins and minerals from the same food.This helpsyou if you want to lose weight in a month and also remain healthy.

3. Make healthier food selections like fruits, vegetables, whole grain cereals,beans,low fat or nonfat dairy products, low fat meats, fish and skinless poultry.
4. Avoid foods that are high in fat and calories.

5. Avoid foods that are high in sugars such as pastries, candy bars, pies and candy.

6. Use a variety of fruits and vegetables in your nutrition plan.Try to eat five total vegetable and fruit servings every day.

These are some simple guidelines that will surely help you in answering your question:how to lose weight in a month?If you follow them very strictly every day it's no doubt that you will see results in less than a month.

You can start it now!

Tuesday, November 17, 2009

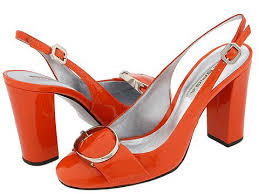
Choosing Fashion shoes

Here some tips to choose women fashion shoes

It is often said that, "First impression is the last impression" so adhering to it don't forget to pay attention to your shoes. It is as important as your wardrobe, makeup and trendy handbags. As necessary is to buy women fashion shoes, equally important is to maintain them and keep them clean. Your dirty shoes might give a wrong impression to other people. Comfort is the keyword you must take care of while selecting your fashionable footwear.

Be clear about the purpose for which you are buying shoes. If you are looking out for party shoes, latest women shoes fashion is of high heels whether pencil or platform heel. You can also shop those feet flaunting sexy stripped open toe sandals. But if you are looking out for casual shoes for ladies, you should avoid high heels specially if your job requires whole day standing. For that purpose, trendy floaters are just apt. Know yourself and in consistency pick up your footwear. If you are tom boyish cum sporty types, floaters and sneakers are the best option.


If you attire in typical Indian traditional style, like a simple salwar kameez, you can opt for Kohlapuri Chappals and Rajasthani Jutis or may just go in for a flat compact sandal that is simple and sober. If you are bold and maintain a hip-hop fashion style, you can actually do a mix match of ethnic and trendy. For sporting activities, we have a special variety of running and walking shoes more commonly known as sport shoes that give you the necessary strong grip so as to enable you to carry out your activity more effectively. Your foot health is important so make the right choice.

And the best way is to try it yourself wheter you are feeling  comfortable with that particular shoes.

How To Make Your Eyelashes Last Longer


Consider these tip to make your eyelashes last longer than usual..

Eyelash longer by most women wanted to be like anyone can remember. There are many ways have to look more to the lashes. The most common is of course more lashes mascara that promises longer lashes.

This will not only really make the lashes longer. Some mascara can give the illusion that the lashes are longer. False eyelashes are a big hit with celebrities from around the world to make, actually longer lashes. Moreover, there are eyelash extensions, where it connected to the cilia temporary eyelid for a certain time, the longest eyelashes.


This procedure is usually done only in salons and spas. I saw a shop a few tricks to them, but only in some areas. There are also products you can purchase which claim to help you grow your lashes. One of the most important things you can do to make your lashes look longer time for their state. You have eyelashes fall daily air and those who help to stay in good shape, too. Sleeping with make-up is a big no-no, especially if you are looking for the longest eyelashes.

If the eyelashes are a very light color, which would not necessarily put the black mascara to enhance its appearance. Vaseline works very well, and clear mascara for eyelashes can any color. With an eyelash curler always helps. You need to be careful with those because they caught in your eyelashes and really pull some out.

Last suggestion, a volume mascara with the color most likely your natural color eyelashes, apply mascara to buy and then use the eyelash curler a few times to be set on them.

Being added a glamorous look would be to add a little "false lashes to the outer corners of her eyes.

Monday, November 16, 2009

Finding An Eye Care Tips

In our Busy Days, Please Don't Foget To Our Most Precious Assets!

Take A vitamin diet to make eyes brighter. (papaya, eggs, fish, milk, cilantro etc.,)

Wash eyes with cold water to get sparkling eyes.
Put sliced cucumber over your eyes to treat dark circles.

Put potato slices on your eye to get rid off those dark circles.

Soak amla overnight in water and use this water the next morning to wash the eyes.

Soak cotton in Luke warm milk and cover eyes with it for 15 min.

To soothe tired eyes, dip cotton pads in chilled milk and place on closed eyes for 10 minutes. Now relax completely.

To completely relax the eyes and the surrounding muscles, close your eyes and think of something that is pleasant or soothing and at a distance. Now gently open your eyes and look into the distance. Next focus on an object at arm's length.

Do this extremely relaxing exercise four or five times a day.

If your eye twitches, or your eyes are red and feeling itchy, massage your scalp with curd.
Soak 1 tsp. dry amla in one cup of water overnight. Next morning strain it through a muslin cloth and then add one extra cup of water.

Splash your eyes with this solution each morning. This makes your eyes sparkle.

For Puffy Eyes: Grate a potato with its peel and apply on your closed eyelids for about 20 minutes and relax completely. You may even take a nap.

Wash your face before sleeping, and ensure that there is no make-up on your face before you sleep, because, make-up creams may spoil your face as it will be there for the whole night.

It is better if no cream is applied. What I feel is, wash your face before sleeping and if at all you want to apply any cream, just apply night cream and none other than that.

Please take care of your eyes..Imagine if you have no eyes?

Sunday, November 15, 2009

Teen Beauty

Searching Teen Beauty Makeup

From LoveToKnow Makeup

Teen beauty interest begins early in childhood. From the days of dress up and pretend play, to the experiments with the magic of makeup transformation. Allowing girls to explore the artistic side of makeup, while in their teens, simply continues their conversion into young women. Even if they never actually leave the house, playing with makeup can be an entertaining learning activity.

The Basics of Teen Makeup

To truly enhance teen beauty, makeup is not necessary. Makeup should only be used to lightly improve a young face. The idea is to look pretty, not painted. Let your natural youthful glow shine through, not your makeup products. True teen beauty is to look your best, without looking like you are actually wearing any makeup.

Always start with keeping your skin healthy, as this will be your best beauty product. Get in the practice of cleansing your skin, morning and night, always making sure to clean off your makeup before bed. Apply acne cream if you are blemish prone at night and always use some sort of light moisturizing lotion with SPF in the morning.

When considering makeup for teen beauty, always respect your family’s values and rules. Makeup for preteens should be limited to only lip gloss, mascara, blush and concealer/blemish cover up. Some experimenting at home is okay, but save any intensive makeup for when you get to high school. Even for teens, makeup should not be an everyday adventure. Love the way you look, as confidence and self-esteem are more important than physical features when it comes to beauty enhancement. Makeup in your youth should be fun – it is not necessary to look perfect – let your makeup be as loose and playful as your age.

Basic Steps

Once you have prepped your skin in the morning – the following is a basic list of teen beauty steps:

  • Cover up any eye circles first – see our article on Concealer for tips.
  • Hide any zits, blotches or redness with a skin colored foundation. Avoid an all over foundation on younger skin – if you have significant acne or redness, at the very least use a sheer formula or tinted moisturizer, then spot cover with a foundation stick.
  • Seal with an all over face powder.
  • Brush your eyebrows up and across with a brow brush or clean toothbrush.
  • Lightly color eyelids with a sheer and shimmery eye makeup.
  • Add a natural flush with blush or bronzer.
  • Apply mascara if using.
  • Finish off with a touch of lip gloss or light lipstick. There is no need to apply lip liner – as it is designed for more mature lips.
Practice Makes Perfect

As the teenage years are the natural time for experimenting in adult behavior, it is no surprise most teens want to jump right into makeup. Keep in mind that learning to apply makeup takes trial and error. Before ever walking out the door with any cosmetic product on – be sure to practice first. It is ideal to invite your friends over for a makeup party. Make it enjoyable and experiment freely – it all washes off anyway. Take pictures so you can best compare the aspects that work for you. Use this time to find the look that works best for your personality, values and skin tones.

Common Teen Concerns

  • Oily Skin

Face powder is the oily girl’s best friend, but don’t overdo it. Too much powder will look unnaturally cakey – so for the in between oil accumulations, try blotting papers or even tissues patted gently on your skin.

  • Freckles

Although it may not feel that way to you – luck shines on those with freckles. Keep them in check by staying out of the sun and using sunscreen – then play up those youthful spots by using a sheer, shimmery powder. If you really can’t stand to have them around – don’t try to over hide them as then your skin will look too fake. Simply cover them lightly with a sheer foundation to make them less noticeable.

  • Braces

If you have got them, you can’t fight them. Braces are there and people will see them – as your smile is your most important teen beauty asset. Therefore, add some extra sparkle to your metal grin with some super shiny lip gloss.

  • Blemishes

What ever you do – try to avoid touching them – and definitely don’t squeeze. This can be hard advice to follow when you have that large volcano on your nose – but keep this in mind – squeezing and poking will not only make it look worse, it will cause it to spread! Instead, try your best to hide these pesky imperfections. Two old tricks that seem to help are to pat white toothpaste on your pimple, let sit for twenty minutes, and then wipe off. Follow this will a drop of Visine to get the redness out. Cover the zit with a perfectly matching, skin color foundation, just to the area on and slightly around the bump. Lastly, pat with powder and ignore. Try not to touch it, as that will only wipe off all your hard work!

Teen Beauty Tips

  • Always remember that you are beautiful, even without makeup.
  • Find your own look with makeup – don’t try to copy others.
  • Take advantage of the free advice and samples at department store counters while you are still learning the trade of makeup application.
  • Glossy and lighter lips are best for youthful faces – save the stronger lipsticks for special events.
  • Sheer colors are the most pleasing on teen faces.
  • Use your creative juices on your nails – nail polish is amusing and colorful.
  • Don’t try too hard with makeup – less really is better.
  • Avoid comparing yourself to the fashion models and teen actors – they are an unrealistic ideal.

Healthy Manicures

10 Tips for Healthy Manicures

Manicure

Millions of women visit manicurists to have their nails professionally manicured every year. Unfortunately, occasionally the result of having manicures is developing nail fungus or bacterial infections which can not only look bad, but may also feel even worse. Although HIV or AIDS can be transmitted through broken skin that occurs during a visit to a nail salon, this is extremely rare. What can you do to lower your risk of developing an infection or fungus, or HIV/AIDS, caused by a manicure? A few simple steps before your next manicure can significantly lower your risk of developing a painful nail infection or fungus, or disease.

  1. Buy your own manicure or pedicure kit and take it with you when you visit your manicurist. Make sure you clean and disinfect your manicure kit after each use, even if you are the only one using your kit.
  2. Bring your own nail polish, base coat, and top coats. Remove your old nail polish at home, or bring nail polish remover with you.
  3. Check out the salon where you have your nails done. Does it look clean and sanitary? Is the trash container properly bagged and covered? Is the floor clean? Are the manicure tables kept neat and tidy? Is there plenty of good light? Look at the disinfectant containers and make sure that they are clear, clean, and free of debris.
  4. If you are not using your own manicure kit: Are all instruments cleaned and disinfected after each use? Does the manicurist use fresh, clean instruments on each client? Does the manicurist remove the clean, disinfected, instruments from the disinfectant in front of you? Make sure all files, buffers, and anything else that touches you is freshly clean before you allow the manicurist to begin.
  5. Make sure the pedicure tub is thoroughly cleaned and disinfected after each client. The steps where clients typically step with bare feet at spa pedicures should be cleaned and disinfected before each client, as well.
  6. Make sure that the manicurists wash their hands before and after each client, and that clients wash before their nails are done.
  7. Never use a towel that is not fresh and clean.
  8. Make sure that plenty of clean, disinfected, nail brushes are available for each client.
  9. Make sure that a new, unused, emory board is used for each client.
  10. Consider using cuticle softener, rather than cuticle scissors to reduce the risk of broken skin occurring.

If these sanitary precautions are not being taken at your nail salon, don’t be afraid to tell the shop owner what needs to change and what you expect from a manicurist and nail salon. Contact your state cosmetology board if you develop a nail infection, fungus, or other condition as a result of visiting a nail salon, or if you see unsanitary practices.

Hope these info will help you when considering manicure your nails..

Saturday, November 14, 2009

What is Deodorants & Antiperspirants?


Facts You Need To Discover about Deodorants & Antiperspirants

While many people believe that deodorants and antiperspirant sticks work the same, the two are very different. The two serve different purposes. Deodorants are agents that mask odors caused by perspiration. Antiperspirants stop the body from producing sweat by clogging the sweat ducts using powerful astringents. Choosing which is best for you is a personal choice. Deciding which is more of a problem for you, odor or sweating, can be a deciding factor.

If sweating is not a main concern for you, but odor is, then you may want to try using deodorant. Deodorants don’t do anything to stop sweating. Instead, it works with sweat to produce a pleasant odor instead of an unpleasant one that can occur with excessive sweating. The ingredients in deodorant neutralize odor by interacting with perspiration by releasing antiseptic agents to control the bacterial level of sweat, which causes the odor.

Many people prefer deodorant to antiperspirants because it allows the body to continue to sweat, the body’s natural cooling process, but keeps odors under control. Many deodorants come in a variety of scents ranging from floral to sea breeze that are released when the person starts to sweat. Unscented deodorants can also be purchased. Also a big advantage to using deodorant is that it can also be made at home in your kitchen, unlike antiperspirants that are chemically based, using simple household items such as baking soda.

Some people may not mind sweating but there are those of us who do mind. Sweating causes embarrassment for some and creates uncomfortable situations, especially people who sweat heavily.


Antiperspirants can be a heavy sweater’s best friend. It completely blocks the body’s sweat ducts by using its active ingredient, an aluminum compound, to clog or close the sweat ducts preventing the sweat glands from being drained. This causes the sweating process to be temporarily cut off. Antiperspirants can work from anywhere between twelve and forty-eight hours depending on which brand you purchase. While antiperspirants stop the body from producing sweat it is not harmful. Since the body has sweat ducts all over, the sweat will simply find another outlet. However, prolonged excessive use of antiperspirants can become harmful to the user over time. Excessive use can cause permanent damage to the duct, causing a painful lump to form under the arm, requiring surgical removal. Another downside to using an antiperspirant is its main component, aluminum, which has been found to be directly related to Alzheimer’s disease.

There are also other factors to consider before choosing which is best for you such as your lifestyle. If you can’t decide which is best for you or unsure of which is best for you. You can always opt for a product that combines both the deodorant and antiperspirant properties. These control both odor and sweating. Of course, if you d

Whiten your Teeth For Free


How can I get whiter teeth for free?

The causes that make teeth color can change are :

1. Age
More long people live, it means they have been eating more foods. More foods that people consume make teeth color automatically change to yellow color.

2. Eating Habit
If people eat foods and drinks that have color,it can make teeth color change too.

3. Cigarette
Cigarette has contain nicotine. Nicotine can make white teeth change to brown or yellow.

Don't spend your hard-earned money on expensive teeth whitening kits! Get the very same results absolutely free. Don't pay a high office call to go to the dentist and get your teeth professionally whitened! You can have white teeth with things that are probably just sitting in your medicine chest or kitchen cupboard. Don't bother with those gel packs that you have to leave on your teeth. Don't buy that expensive mouthwash for smokers! You have everything that you need to brighten and whiten your teeth right in your own home. Remember that this is free and it works.

Do I have these items in my house?

All you need to whiten your teeth are simple household products. Ok, first go to the kitchen. Open the cupboard where you keep your baking supplies. Do you have baking soda? You probably do. Spoon about two teaspoons of baking soda into a little bowl or cup. Now, travel over to the nearest bathroom. Open the medicine chest. Do you have hydrogen peroxide? You probably have this common household item, too.

How do I make this paste?

Drop two or three teaspoons (this may not be exact) of the hydrogen peroxide into the baking soda, making a paste. This sometimes takes a little trial and error. Be sure it is the same consistency as toothpaste. If you wish, you can add a bit of mint flavoring or even a small dollop of toothpaste.

How do I use this free whitener?

Brush your teeth with your mixture, being sure to leave it on your teeth for at least two minutes. Do NOT swallow this paste! Trust me, you wouldn't want to swallow it- the taste is not the best. To make the paste taste better, try to use the above tips. This will help to make the taste a little bit tastier.

What should I do after using this paste?

After you finish brushing with this free paste, brush again with regular toothpaste to rid your mouth of the taste as well as the peroxide solution. You will be amazed at just how white and bright your teeth will be! Many smokers and heavy coffee drinkers use this little trick. This may be a home remedy that your grandmother even used.

I have a dental condition. Should I try this whitener? Beware that if you have open sores, cavities, gingivitis, or other gum diseases this may make your gums appear white for a short time. This may not be the whitener for your teeth if they are very sensitive. As with anything, you should consult your doctor or dentist before trying this or any other medical treatment.

How often can I use this paste?

· This treatment can be done weekly, monthly, or whenever you want extra bright teeth!

· You shouldn't brush with this mixture more than once per week.

List of Items Needed

· 3 teaspoons of hydrogen peroxide (the amount may vary depending on family size)

· 2 teaspoons of baking soda (the amount may vary depending on family size)

· Optional (A small amount of toothpaste or drop of mint flavor may also be added.)

Hopefully, this infos put a bright smile on your face!

Fight Cellulite!


How To Spot Cellulite?

(Like you didn't know!) Cellulite is easy to spot. It's the "orange peel" look or "dimpled" or "bumpy" appearance that shows up primarily in women, frequently after their first child, and primarily around the thighs and buttocks area.

What Is Cellulite?

The fatty tissue immediately below the surface of your skin rests on top of (and is bonded to) a firm layer of collagen connective tissue. Before cellulite shows up, the outer surface of the skin is smooth and supple (no bumps and no ridges). The skin is smooth because the surface of the fatty tissue just below the skin is ALSO smooth.

The fatty layer just below your skin is (and remains) smooth and supple as long as the fat cells remain strong, healthy and flexible.

Defined as a cosmetic problem, cellulite is one of the most hated words in the English language. Cellulite causes dimpling in legs, buttocks, thighs, stomach and even arms. It can look unsightly and make you want to hide behind long pants and shirts if your case is severe.

Many people wonder what cellulite is exactly and it's nothing more than fat. Women and even some men have been praying for a miracle cure for cellulite for years, but nothing has come about. Though it may be unsightly, it's perfectly normal and many people have it.

But, if you're very worried about the cellulite you do have, the key to having firm legs is exercising. Though it probably won't erase all signs of cellulite from your body, exercise will tone you up and help to smooth out some of those hated bumps and lumps. Varying your exercise routine can help as well. Do cardio for at least 40 minutes a day and alternate in some weight lifting on different days. Lunges work well for thighs and buttocks if those are your problem areas.

Also, you've probably thought once or twice about buying one of those cellulite reducing creams you've seen in grocery stores but weren't sure if they actually worked, right? Well, the jury is still out on that one but some creams do have proven firming ingredients in them. So, if you have the money and want to try them, why not?

Spas offer treatments for cellulite as well. Some have massages that are supposed to rub your problem areas away while others have more advanced treatments to help tone and firm. These can often be pricey though they sometimes come with a money back guarantee. So, if you're really bothered by cellulite, there are options for you. Don't hide behind your clothes any longer and keep trying different things until you find the one that works for you!

The picture above is one of example of cellulite cream in the market.
You can search which cream most suits you through the ads of the blogs.

Friday, November 13, 2009

Tips To Color your Hair Using Special Effects


Getting Nice Hair Color Using Special Effects

Special Effects is a hair color that comes in some vibrant,wild and funky colors like, Blue Mayhem, Purple Smoke, Devilish and Napalm Orange just to name a few. Whatever your favorite color is they have it in a haircolor. The colors are semi-permanent and fade with each washing. Let your creative side shine through with these colors!

Step 1

Firstly, do shampoo you hair, do not use conditioner afterwards, and make sure to dry hair thoroughly. Then apply a layer of petroleum jelly around hairline and on ears this is to protect skin from staining). * Important - you should wear plastic gloves to avoid staining of hands.

Step 2

After that pour the desired amount into plastic bowl. (Approximately 1/2 bottle for short hair, 3/4 bottle or more for longer hair.)
Apply evenly with tint brush from roots to ends, just enough to saturate hair. Do not get color on the scalp.

Step 3

Comb color mixture through hair thoroughly and leave in hair for approximately 15-30 minutes, the rinse color out until water runs clear, shampoo, blow dry and style hair as usual.

Tips & Warnings

Colors will be more intense and last longer if you bleach the hair first. (May last up to 8 weeks or longer on bleached hair.)
Colors will give more of a highlighted effect on dark hair.
Color fades a little with each shampoo.
Lasts approximately 3 to 6 weeks depending upon hair type.
Haircolor stains do not get on clothing or skin, if you do gently rub with rubbing alcohol before washing with soap

There you go!!!

Getting Free Of Acne Skin!

Having that nasty zit is sometimes quite annoying. In fact, it is a great factor on suffering low self-esteem particularly on young people whose main focus at puberty is the physical attribute. Preventing acne breakout is not a piece of cake that is why even if you know everything about acne control, the acne still shows up every now and then. The lack of time to maintain acne free regimen daily contributes to the breakout. So how do you maintain your acne free skin? Here?s how you can do:

1. Do not prick the acne affected area. Touching it with bare hands can cause further irritation. Unclean hands carry undesirable microorganism that can cause acne. So it is rather safe to keep your hands or any other object from your face to impede the inflammation of the acne and scarring of the skin as well.

2. Avoid using oil-based products on your hair. Guys and girls wear hair products to improve their appearance. Dermatologist might agree that the products are safe on the scalp however, this chemical-laden beauty products slide down to your face as you sweat out. The fluids goes down to the acne hence aggravate the already affected area of the skin.

3. Minimize the use of cosmetics over the pimple. It is alarming to know that although beauty products can conceal your pimple break out, it increases the risk of infection. The combination of the harsh compounds on your foundation makes up and bacteria that come with the sponge (if the foundation you are using is not newly opened) exacerbate the acne. If your job requires you to wear make up, you should avoid those generic brand make up. Some generic brands of make up do not mention the harsh chemicals that are present in the product.

4. If you are using alcohol-based and oil-based facial wash or toner, taking a break will somehow minimize the inflammation of the skin.

5. Avoid getting anything that might contain microorganism to touch your face. These include your unmanaged hair, dirty handkerchief, towels and even pillow. The only way to control the transfer of organism to your face from the material of origin is to always keep your hair in a bun or use a hair band that will keep it in place away from your face, a fresh pillowcase for your cushion, and clean towel and handkerchief to wipe your face.

6. An over-the-counter ointment can be bought from your local drugstore. A topical cream or ointment containing benzoyl peroxide is your best bet to vanish that undesired acne. Some dermatologist recommends tretinoin-based products cream over the benzoyl peroxide because of irritant threat on the peroxide content. Depending on how sensitive the skin is, you can choose from the two.

7. If the acne is severe, a visit to your dermatologist is needed. The dermatologist will prescribe oral antibiotic to take at a certain period of time. Or if applies, an adapalene gel will be prescribed by the dermatologist for you to use for time duration. Close monitoring of the medication is needed since like other prescription-required medicines, it might trigger unknown allergies.

Happy Acne - Free Today!

Choosing The Right Cosmetic For Your Skin

The right cosmetics for any skin type is important to create a fresh natural appearance as well as to prevent reactions to the cosmetics such as allergies with resulting rashes, itching and weeping or breakouts with whiteheads or blackheads and painful skin eruptions. Every person?s skin is unique and different areas on a person?s face may have different characteristics which must be taken into consideration when choosing appropriate cosmetics.

If you?ve been disappointed when your powder eye shadow creases and slides before lunch or your foundation looks lined and caked, understanding the characteristics of your skin and purchasing appropriate cosmetics for your skin type is a worthwhile exercise. Here are some tips to help you look your best.

Avoid cosmetics that dry or irritate your skin

Each different skin type will react differently to the various types of cosmetics. Even if a particular brand works for your eye shadow, the same brand may not work for lipstick. This is because the skin type on your eyelids may be very different from the skin type on your lips. When you are choosing cosmetics such as foundation, for example, avoid drying cosmetics or cosmetics that cause your skin to break out. Unfortunately, you may have to try several products in order to determine those that work on your skin consistently. Another issue which must be considered is that your skin may build up a reaction to a particular cosmetic which did not previously cause a skin irritation, so you may be forced to find an alternative to a tried and true brand which worked well in the past. Skin characteristics may change significantly over a lifetime as well, forcing a change in the type of cosmetics which you select.

Consider your skin tone when selecting cosmetics

Even if the particular type of cosmetic is just right for your skin type, choosing the wrong color?one which is either too light or too dark will make the cosmetics less than attractive. Select cosmetics that complement and match your skin tone and minor imperfections in skin tone and texture will disappear. Darker foundations, deeper colors for eye shadow and eyeliner will be best suited for those with chocolate or olive skin tones. On the other end of the spectrum, if you have pale skin, you should choose lighter shades of foundation and eye makeup. Cosmetics should enhance, never overpower the skin tones.

Invest in quality makeup

Quality makeup often tends to get painful to the pocketbook, but it shows on your skin. Cheap makeup can cake or slide on your skin and isn?t as likely to blend. It is more likely to sit on the surface, giving a plastic look. Look for good quality cosmetics that aren?t necessarily expensive. It?s better to invest in yourself by purchasing quality makeup that you know looks great with your skin type.

Dry Skin

If you are the victim of skin that is dry, don?t despair. You should find a mousse or cr?me type foundation. If you use a concealer, make sure it is cream based and your compact powder should be pressed compact powder. You should avoid loose power or oil free formulas as they will tend to settle in the fine lines on your face. Eye makeup is best done with silk-textured powder or cr?me eye shadows and eyeliner should be either a shimmer pencil or a matte type. Moisture is the key word with lipsticks and lip glosses. Find a moisturizing lipstick and use lip gloss that has ingredients such as aloe or vitamin E, both of which provide additional lip moisture.

Sensitive Skin

Look for products that are labeled specifically for use with sensitive skin and avoid fragrances in your cosmetic products. Non-allergenic is another phrase to look for on the labels. The key is to avoid anything with high dye levels or preservatives.

Combination Skin

You can either choose different products for different skin conditions on your face or you can select products which are specifically created for combination skin. Even so-called normal skin often has areas which are more or less oily than other areas. Normal skin may have times during the monthly cycle when it is oilier than usual.

Oily Skin

For oily skin, try using an oil free primer before applying a matte type foundation that won?t clog your pores.Loose powder has fewer oils than pressed powder. Blot the skin periodically throughout the days to remove any shine. Avoid cremes for eye shadow or mascara and creamy style lip pencils.

Cleanser options

Avoid harsh or drying cleansers as well as greasy cleansers since either extreme will react unfavorably with your skin type. The best skin cleanser, regardless of the skin type is a water-soluble cleanser that is gentle on the skin.

Thursday, November 12, 2009

Detox Your Body With a Sauna

Fact You Have To Know About Detox

Did you know that you can actually detox your body of various environmental pollutants through the use of a sauna?

Most people associate a sauna with a pleasant day spa experience that is designed mainly for relaxation and stress reduction. While saunas certainly are great products for relaxing and reducing stress, they also provide a major health benefit when used properly. Using sauna treatments as a way to eliminate chemicals and heavy metals from the body is very effective. In fact, some major environmental medicine clinics use this method to enhance their treatment of patients who are disabled by chemical exposures.

The skin is one of the several organs in the body that helps to detox the body of harmful toxins. Along with the kidneys, liver and gastric system, the skin provides a serious detox function for the body. When sweat is produced, stored toxins are released through the pores and swept away as profuse perspiration is experienced through a sauna treatment. A normal person should be able to tolerate a sauna treatment of at least 10 to 15 minutes 3-4 times a week.

However, those who already have health problems or who are suffering from heavy environmental illnesses, may need the supervision of a health care professional to experience the best benefits from a sauna treatment.

There are several ways to take advantage of sauna detox treatments and to add this method to your overall health strategy for life. Some people simply join a health club that offers saunas to their club members. This way, you won't have to be responsible for the expense of owning your own sauna. There are, however, personal saunas that are manufactured today that are reasonably priced. These units fit in a home basement or work out area. They are not very large and are usually light weight cedar box units with a sauna heater. There are also some personal units that are made from other materials. You can have your own sauna treatment at home any time you want.

Today's environment necessarily exposes everyone to harmful chemicals through the air, water and food. In order to stay healthy or to relieve some health problems already in progress, it can be extremely helpful to add a sauna treatment to other internal detox methods. If you are experiencing health problems, it is wise to seek the advice of a natural health care practitioner about the amount of time and how often you should use a sauna to help detox your body.

Getting Beautiful With 8 Honey Beauty Tips

Hi readers!

Hope these Infos are useful to you..

According to the dictionary, honey is a sweet yellowish or brownish fluid produced by various bees from the nectar of flowers. Besides using honey as food, did you know that honey is one of the oldest and most effective beauty aids?

Honey contains waxes, sugars, and traces of minerals. It is a natural moisturizer, as well as an anti-irritant making it suitable for sensitive skin types. Honey can be found in many of the beauty products you find in your local drug store or favorite beauty supply store. Some of these products can be very expensive to purchase and many of these products can be made at home.

Try some of the following honey beauty tips below. Please be sure not to use honey on your skin if you are allergic to it!

1. Honey mask: Apply pure honey to your face and allow it to set until dry. This will take about 15 minutes. Once dry, rinse your face with warm water.

2. Body glow bath: To moisturize, smooth, and get an all over body glow, keep a jar of honey next to your bath. Apply honey on your skin and pat dry using both hands. While patting your skin, the honey will get sticky and gently pull up your skin. Rinse away the honey when you are done. The results will be great circulation and beautiful, glowing skin!

3. Honey bath: For sweet smelling and soft skin, add ? to ? cup of honey to your bath water.

4. Honey scrub: Mix 1 teaspoon of honey with a little almond flour into the palm of your hand. Gently apply on your face for a facial scrub. Rinse your face with warm water to remove honey scrub.

5. Daily facial cleanser: Mix 1 teaspoon of honey with a little milk powder into the palm of your hand. Apply on your face to clean away dirt and makeup and then rinse with warm water.

6. Shiny Hair: To add some shine to your hair, mix 1 teaspoon of honey, a squeeze of fresh lemon, and 1 quart of warm water. Shampoo your hair as usual and then pour the honey mixture on your hair. Allow your hair to dry as normal. You do not have to rinse out the honey mixture.

7. Hair conditioner: For healthy hair and scalp, combine ? cup of honey and 2 tablespoons of olive oil. Saturate your hair with the honey mixture, put on a shower cap and allow it to remain on hair for 30 minutes. After 30 minutes, shampoo and rinse your hair as you normally do.

8. Skin toner: To firm, smooth, and moisturize your skin, combine 1 peeled, cored apple with 1 tablespoon of honey in a blender. Pulse honey mixture until smooth. Gently apply honey mixture on face and allow it to remain for 15 minutes. Rinse your face with warm water to remove the honey mixture.

With the above beauty tips, you can create affordable spa-like products at home. Honey is a wonderful beauty product because it contains naturally occurring enzymes, vitamins, and minerals. Be sure your honey is all natural by purchasing only 100% pure honey to create your beauty products.

If you have try these tips,kindly post a reply to share with other readers...thanks

Wednesday, November 11, 2009

Finding the Best Men’s Perfume for Him

mosaic-perfumes-men-christmas


Perfume is always a great gift idea for your man however it can often be rather difficult and confusing when it comes to actually finding the right perfume for your man. There are so many different ‘perfumes for men’ on the market now, especially since the increase of popularity of men in fashion and beauty, and so the decision process can obviously be quite overwhelming.


One of the best options that you have when it comes to perfume for men is Aspen for Men. This fragrance is considered as being a unique and aromatic creation that is blended with distinctive top notes of lemon, bergamot and the freshness of mint, with middles notes of lavender, vetiver and spice, and this is all supported by a background of oakmoss, amber and musk, for the perfect overall clean and masculine scent.


Another of the best types of perfume for men is the Armani Cologne for men by Giorgio Armani, and this is one which is definitely not for the weak personality man. This scent is considered as being a necessity in the collection of the gentlemen of style, and it offers a clean and citrusy scent with notes of lavender, bergamot, cedar, clove, nutmeg, and patchouli.


There is also the Adidas Adrenaline perfume for men, which is a masculine and fresh scent that possesses blends of citrus with herbs. It is intended for the urban man who challenges himself to feel the rush of life’s experiences, and is designed specifically for those men who are seeking feelings of control, challenge, mystery, strength, and a sensory rush.


Choosing the Right Perfume for Your Man

It can be tricky enough trying to find a perfume for yourself, but when it comes to finding one for your man the process can be even more difficult. This is particularly true if the perfume is going to be a surprise gift, because then you are not able to test it out on the guy first, meaning that you are really just going to have to take a knowledgeable guess on what you think would smell good on him.


After all, you have to consider the fact that every fragrance smells differently on each person, due to their natural body scent, and so you may want to give yourself an idea of what he smells like naturally, and then work from there in order to find the best option for him in particular.

Choosing the Best Mens Skin Products

Here some infos in choosing Mens Skin Product.


Everyday, there seem to be more and more mens skin products coming out. This makes the problem of finding the best even more difficult for men.

You have to read some men's skin care reviews to narrow down your search, for example. You have to ask questions such as, which one has the best ingredients? Which one can I put on with the least effort? Which one will be effective on me?

To make your search simpler, here are some important steps you can follow when looking at male skin care products.

Rules No. 1

Know your skin type

Just as for women, you have to know your skin type to know what kind of male face skin care will work best on you. There are about 5 types of skin type: normal, oily, sensitive, dry, acne-prone or combination skin.

You are lucky if you have normal skin and have no recurring skin problems as you can use most mens skin products. If you have oily skin, you will need products which are oil free and light-weight. If you have dry skin, you should go for products containing moisturizing properties such as allantoin and aloe vera.

Men face skin care for acne-prone and sensitive skin should include noncomedogenic or fragrance and irritant-free formulations. If you have combination skin with dry and oily patches, mild cleansers and moisturizers will work well on you.

Rules No. 2

Identifying men's skin products that actually work

Once you know what skin type you have and what you exactly need, you will need to spend time looking through mens skin products. This is actually easier said than done. How do you know which product can provide the best men's skin care? How do you know which one will work and which ones never go beyond their fancy packaging?

Well, you can start by knowing the basic skin care routine for men: cleanse, exfoliate, shave and moisturize. This means that you need a good liquid cleanser, a scrub, a shaving cream (plus an after-shave), and a good moisturizer. If you get one of each, then your skin care would never go wrong.

So which one should you choose? The best advice is to check the labels and look for products that contain natural ingredients (no irritants, dyes or other additives). You can check on these ingredients to see whether they are what you actually need. Know that men's skin products can sometimes be expensive. The price is never a guarantee on its effectiveness. Never settle for the unreasonably cheap ones as well or they just might not work at all.

Highly suggest you to go through the mens skin products by L'oreal for Mens skin care or Nivea For Mens. I have looked through a lot of product lines for men but I have not seen something as promising. Their all natural, key ingredients have been well-researched and their 90-day money back guarantee might make your purchase all the more risk-free.

Find Out Men Beauty Secrets Here

An Alert For All Men Out There!

Men's Beauty Tips


Men's Skin Care Needs

1. Men's skin has larger pores, on average, than women's skin, so it is more prone to oiliness and gets dirtier faster. Daily cleaning is a necessity. Products to look for should be all-natural and fragrance- free, if possible, because the skin does not need extra irritation. Men need to rely on their skin alone, without enhancements such as makeup or eyebrow tweaking. On top of this, shaving daily gives their skin an extra irritation that needs care. Because men's skin tends toward oiliness, care needs to be taken to choose the right moisturizer.

Facial Mask Recipe for Men

2. There are several lines of skin-care products especially for men. Choose one with as few synthetic ingredients as possible, or make your own. You can buy benzoate clay in bulk at many health-food stores. This clay is an excellent base for most male skin. Add to the clay some raw honey, green matcha tea (a specialty Japanese tea powder and great antioxidant), and water to even out the consistency. Spread onto your clean face, lie down and relax for about 15 minutes. Wash off. This mask should remove impurities, tighten pores, moisturize and add a healthy glow. It's great before a date!

Exfoliate

3. Men's skin needs to be kept extra clean. Using a simple scrub helps to keep skin clean, remove dead skin cells and tighten pores. Again, there are many men's brands on the market, or you can make your own. Try this sugar rub: Simply mix brown sugar with sesame oil, rub it on your face and wash off. This scrub will not overly dry your skin, but will remove dead skin cells and rejuvenate the appearance.

Moisturize

4. The best moisturizer for men is the light variety. Try pure aloe vera gel, straight from the plant if you can. If not, look for it in a health-food store where you can be more certain of getting a pure product. Also, try pure vitamin E on your freshly-cleansed skin. This should help against blemishes and also be light enough for most men's skin.

Shaving

5. Shaving is very harsh on skin. Aloe vera works as an after-shave that will tighten pores and not dry or damage skin like alcohol will. Treat your face as carefully as you can before and after shaving, by gently cleansing before, and treating with either aloe vera or a similar, non-alcohol product after.

Exercise to Enhance Beauty

6. Exercise induces sweat, which removes toxins from the body. It also relieves stress, which, among other benefits, enhances beauty. Having a strong, muscular body not only makes you more beautiful, it most likely increases your confidence, which is one of the best beauty enhancers.

Monday, November 9, 2009

Botox & Restylane

Hey Ladies!

Many cosmetic dentists are offering Botox and Restylane treatments in addition to cosmetic dentistry to enhance facial aesthetics as well as the smile.

Botox

Botox is used to soften facial lines or wrinkles caused by excessive frowning or smiling. It acts by relaxing the muscles of facial expression.

Botox - Is It Safe?

If administered in the right doses by qualified professionals, Botox is perfectly safe as long as your medical history and allergies are to be checked before administration.

How Long Does It Last?

On average Botox last 3-4 months, but after continued application it may last longer.

Restylane

Restylane is a facial filler that can correct facial lines, wrinkles and deep folds.

Restylane- Is It Safe?

Restylane, like Botox if used by a qualified professional is safe. It is made of hylauronic acid which breaks down to water after a few months.

How Long Does it Last?

It usually lasts 6-12 months. It can be used on lips, forehead, cheeks and chin. Just like Botox, if you stop treatment your lines will return to how they were. They will not get worse!

Botox is used to correct lines and wrinkles on the forehead, frown and eye lines (crow's feet). Botox treatment takes 5-10 minutes and is painless to have done. Botox usually takes 3-10 days to take effect and can last 3-6 months.

Some people are worried that Botox may leave you expressionless, but our highly experienced and trained cosmetic dentist can administer Botox to suit your personal needs so that your wrinkles and lines disappear without losing expression.

Perfect Smile Spa is a cosmetic dental practice that specialises in facial aesthetic treatments like Botox and Restylane as well as routine cosmetic dentistry.

Sunday, November 8, 2009

Anti Ageing Remedies At Home


Many people hate the thought of aging. While there is a wealth of products on the market today some people prefer to use natural products. In these slow economic times using natural products from your kitchen will prevent putting a hole in your wallet and if you do use anti aging products these ingredients can work in conjunction with your store bought face creams.

So what are the best ingredients you can use on your skin for anti - aging? When you go into your kitchen you will find most of the ingredients in your cupboard or refrigerator.

Vitamin E is good for your skin and the there are a number of oils you can use on your skin. You can use olive oil, apricot oil, almond oil, wheat germ oil and coconut oil. All these oils contain vitamin E and are great for your skin. Before you apply wash your face thoroughly with warm water to open up the pores. This will help the oil penetrate faster. You can use at night or during the day. If you use make up, make sure you wait thirty minutes before applying your powder or foundation. If you don't like the oily feeling on your skin during the day, then use only at night.

Green tea, not only for drinking but you can apply it on your face as well to instantly rejuvenate your skin.

Not many people know this, but potato is great for anti aging as it has a great lifting effect. You can put a slice of potato on each eye and relax for twenty minutes or you can puree it together with apple sauce and apply to the whole face. Leave on for fifteen to thirty minutes then cleanse of using luke warm water.


Oatmeal is also great for a face mask as it is highly nourishing. You can mix oatmeal with honey and lemon juice and leave on for thirty minutes. After wards cleanse of with luke warm water and tone and apply moisturizer. Honey can also be used on its own as a mask. Before applying cleanse the skin with warm water to open the pores then apply a thin layer of honey. Skin will feel softer instantly.


A great natural ingredient for instant lifting is egg white. Apply directly to the face and lay back for thirty minutes. As the egg white dries you will feel the pulling on your skin. Egg white can be difficult to cleanse off so you can use a cleansing milk first then rinse off with warm water.

Mayonnaise makes a good moisturising mask. Apply directly to the skin leave on for fifteen to twenty minutes. Before cleansing off massage it into the skin for a short while then cleanse off with luke warm water.

Saturday, November 7, 2009

Smokey Eyes


How to Create Smoky Eyes

Smokey eyes have been a big style for quite awhile and there's no sign this particular trend is dying. Here we show you step-by-step instructions on how to get the perfect smokey eye.

The key to the perfect smokey eye is proper blending. You want to make sure colors are blended together flawlessly. Also, it's important to pair light base colors with rich dark colors. Nice mixes include: Soft gold base with deep purple on top, champagne base with bright blue and peach base with green hue.
Difficulty: Easy
Time Required: 5 minutes
Here's How:

1. Prep the lid. The key to keeping eyeshadow from melting into your eyelid crease as the day goes on is to kept eyelids oil-free. To do this start with an eyeshadow base (also called "primer"). I prefer to dab at bit of MAC's 'paint' on lids before shadow application. Or try Fresh Freshface Perfecting Eye Primer.

2. Apply eyeliner. If you're going for a typical black, brown or gray smoky eye, apply liner in one of those colors above the upper lash line, drawing line thicker in the middle of eye. If your opting for a jewel-toned eye (violet makes a gorgeous smokey eye), line eyes with a purple, blue or deep green liner.

3. Blend in color on bottom lashes For color on the bottom (a key smokey eye look) you'll want a lighter eyeliner. The key is to "smudge it." You can also apply a bit of shadow to get full smudge effect.

4. Apply light base color Again, the key to a smokey eye is pairing a lighter base with the darker hue. I prefer a nice cream shade for my base. Sweep a light, shimmery shadow over the lids to your browbone. I love Stila's whipped eye shadows $20. The moist "mousse" consistency seems to stay on forever. My favorite colors are taupe and pearl.

5. Blend in darker color, but keep dark color below the crease. Now that you have the base and eyeliner on, it's time to get the smoky effect. You need a darker eyeshadow shade. Using an eyeshadow brush blend in color starting at your lash line, blending up. Make sure to blend color into the lash line so the eye liner disappears. Stop deep color at crease.

6. Doublecheck your work Make sure eyes match and blend color with a Q-tip if need be.

7. Finish with several coats of volumizing mascara. Tried and true mascaras (featured in "Elle" magazine) include DiorShow Mascara & L'Oreal Paris Volume Shocking Mascara. Elle's writer says they are the best volumizers she's tried.

Tips:

1. Remember to keep lips nude. When applying strong makeup (like smokey eyes or red lips) put the focus on either eyes or lips, never both. (Think Angelina Jolie: She either plays up her huge eyes or her huge lips, never both. If she did, she'd look like a clown).
2. For a bit of fun, try a blue or purple mascara. It will make blue eyes "pop."
3. Liner doesn't have to come in pencil form. Makeup experts know eyeshadows make some of the best eyeliners. To do this take an eyeliner brush (available at Sephora, MAC or any dept store), wet it, then dab wet brush into the dark shadow. This allows for a deep, precise line. You can also use the dark shadows without wetting brush first. Either way, eyeliner is necessary for smoky eye.
4. This season go jewel-toned (blue is great for you blue-eyed girls) and keep your eyes smoky but stay away from dark browns and black. Instead, go for a deep purple, a gold-brown or any of the many vibrant colors in this year.

What You Need:

* Eye primer (you don't need it, but it's great for keeping shadow in place)
* 2 Shadows: One light, one darker
* Eyeliner
* Makeup brushes
* Mascara

Friday, November 6, 2009

Here's Different Types of Perfume Making Procedures at your home


Perfume plays a vital important role in our life. So care must be taken in selecting a perfume for you. There are different types of Perfumes for different types of events and occasions. Shopping for different types perfumes is a cost effective matter. So here are the some procedures to make Perfume at your home, which saves your money and time.


Whispering Rain Perfume:
Things you’ll need:
• Three tablespoons of ethyl alcohol
• Two cups distilled water
• Ten drop of bergamot fragrance oil
• 5 drops of sandalwood oil
• Ten drops of cassis essential oil.

Procedure:
Mix all the ingredients in an airtight bottle and shake well to mix it. Before use, leave it for 12-15 hours. When you use it shake well and save it in a cool and dry area.

Falling stars perfume:
Things you’ll need:
• Take 2 cups of distilled water
• 5 drops of lavender essential oil
• 10 drops of chamomile essential oil
• 10 drops of valerian essential oils
• 3-tablespoon vodka.

Procedure: Pour all the ingredients in a bottle and shake it well. Bottle should be a dark colored one. Allow it to rest for at least 12 hours before use. Make sure to store it at a dry place.

Amaze Perfume:
Things you’ll need:
• 10 drops of cypress essential oil
• 3 tbsp of ethyl alcohol or vodka
• 2 cups of distilled water
• 5 drops of hypericum perforatum essential oil
• 10 drops of rosemary essential oil.
Method: Pour all the ingredients in a bowl and mix thoroughly. Then pour the mixture in a bottle. Leave it for 12-15 hours. Store this at dry and cool place. Shake it well before use.

Flower Essence Perfume:
Ingredients: Take 50 ml of Ethyl Alcohol, 5 drops of Rose Essential oil, 12 drops of Lemon Essential Oil, 2 drops of Sage Essential Oil, 30 drops of Rosemary essential oil, 2 drops of Mint essential oil and 5 drops of Neroil Essential Oil.
Methods: Take a bottle and pour all the ingredients. Shake it well to mix well. Before use, leave it for 10 hours. You should store it at dry and cool place. This perfume can be used up to one month from preparation.

Preparing Solid Perfumes:
Things you’ll need:
• Take 2 tbsp of grated beeswax
• 2tbsp plus one tsp of sweet almond oil
• ¼ stearic acid
• ¼ tsp of emulsifying wax
• 2 tbsp of distilled water
• 1-2 tsp of Essential oils.

Melt the beeswax and emulsifying wax in the double boiler. When wax gets melted, add almond oil, stearic acid and water to it. Keep stirring it while heating to mix it thoroughly. Remove from heat and add essential oil. Pour this into small jars. Do not use microwave for this recipe. Thus the above are the different types of Perfume making methods for you. Let try at your home and save your money on your shopping.
Try it!

Web Search

Custom Search

Sponsor Links

7 Minutes Body
Burn Your Fat
Visit Me!
www.7minutebody.com

Fight Acne
Find Solution Here!
Best Deal Ever
www.acnenomore.com

The Top Loss Secret Solution!
Get Your Perfectbody shape!
www.fatlosssecret.com